You guys! I knew it would happen, but I did not know when..or how.
And then it just sort of happened! We now have 8 baby chicks!
In this blog post, I’ll walk you through what happened, what products I’ve used and any tips I’ve gathered in the first 4 weeks of raising 8 baby chicks. Continue reading if you want to save on time and money!

THE EGGS
I was looking for hatching eggs available around Calgary. In February, there weren’t that many.
I had found a few farms online where they had hatching eggs available but the price point was too high, and I did not care for purebred chickens at that point. Because you can’t sex eggs, I didn’t want to spend a bunch of money on what could have added up to 12 roosters in the end.
Finally, I went on Kijiji, and found an ad for BYM chickens. I had no idea what that even meant! Turns out it means “backyard mix” which is when the breeds are all mixed in one flock, and you get what you get in terms of the breed. Speaking of, not knowing exactly what breeds you are hatching can complicate the sexing process. For example, I have a 4-week-old black Maran with a large comb compared to my other black Marans. It could be that it is crossed with a Leghorn, but I won’t know for sure for another few months.
I’ve read somewhere in a book that pointy eggs are roosters and round eggs are hens. Based on that, out of 8 baby chicks we have 2 roosters and 6 hens. Time will tell if this is accurate! Sometimes it can be difficult to tell if it’s pointy or round, but other times it is very clear.
ABOUT THE INCUBATOR
I got this 12-eggs incubator with an automatic turner on Amazon:

Brand – Okkobi M12
Cost – 68$
I think it was a good first incubator. I didn’t know what I didn’t know, so it did the job. Until I realized the temperature wasn’t accurate and there was no way to control the humidity. It comes with a bottle you fill with water and it sits on a dispenser. By default, if you fill the bottle and leave it on the dispenser, the humidity % sits around 80%.
It’s GREAT for the last 3 days (lockdown) when the humidity needs to be at that level. But for the first 18 days, it is too high.
For that reason, I bought a hygrometer and thermometer combo on Amazon (THIS ONE) for 22$ and taped on the inside of my incubator so I was able to monitor the humidity levels and temperature. It comes with suction cups but one of them was dented and wouldn’t stick so I used tape and it worked just fine.

THE WAITING GAME
That’s the hardest part! You worry you aren’t ready, you realize you don’t know anything about anything, you read all the books, the blogs, the IG posts, watch all the Youtube videos, etc. You want to candle your eggs every day, and want to give “more time” to eggs that are clearly not alive anymore…
After a while, you need to let it go. You have your brooder set up, a starter chick feed supply, a waterer and a feeder, pine shavings, and a heat source (more on that later). That is ALL you need to worry about for now. That’s literally all our 8 baby chicks required.
ABOUT HATCHING
That was truly fascinating to me. These tiny birds know exactly what to do, and they are so strong and full of life right off the bat!
I could hear little noises coming from the shell on the last day before pipping. It was the most adorable thing! I’ve also noticed the chicks peep and reply to the others’ peeps while in the incubator. They also sometimes responded to my voice when I talked to them while they were still in the egg.
When they started pipping, I was talking to them and encouraging them to keep going and that we couldn’t wait to see them! Haha! Very Disney movie like.
They generally do not need your help to hatch. You don’t want to open the incubator as the humidity levels will drop and that will cause problems. I won’t go into details about the health issues of chicks and such in this blog post. There are other bloggers much more knowledgeable than me with incredible posts covering these topics you can find online.
THE BROODER – First 3 weeks
I bought a Sterilite tote at Walmart. The biggest I could find. THIS ONE.
I cut open the lid and zip-tied chicken wire to it so they could have air, but not fly out.

We had bought a brooder starter kit at Princess Auto for $50, and that included a heat lamp so we decided to use it. We hooked it to a saw horse right above the brooder. Figured we could adjust the height that way and move it through the wire mesh as we go up.
Disclaimer: I had read that shavings may not be great for day-old chicks because they do not know what’s food and what’s not. But I also read that newspapers are full of lead and can be slippery. So, I opted for shavings.
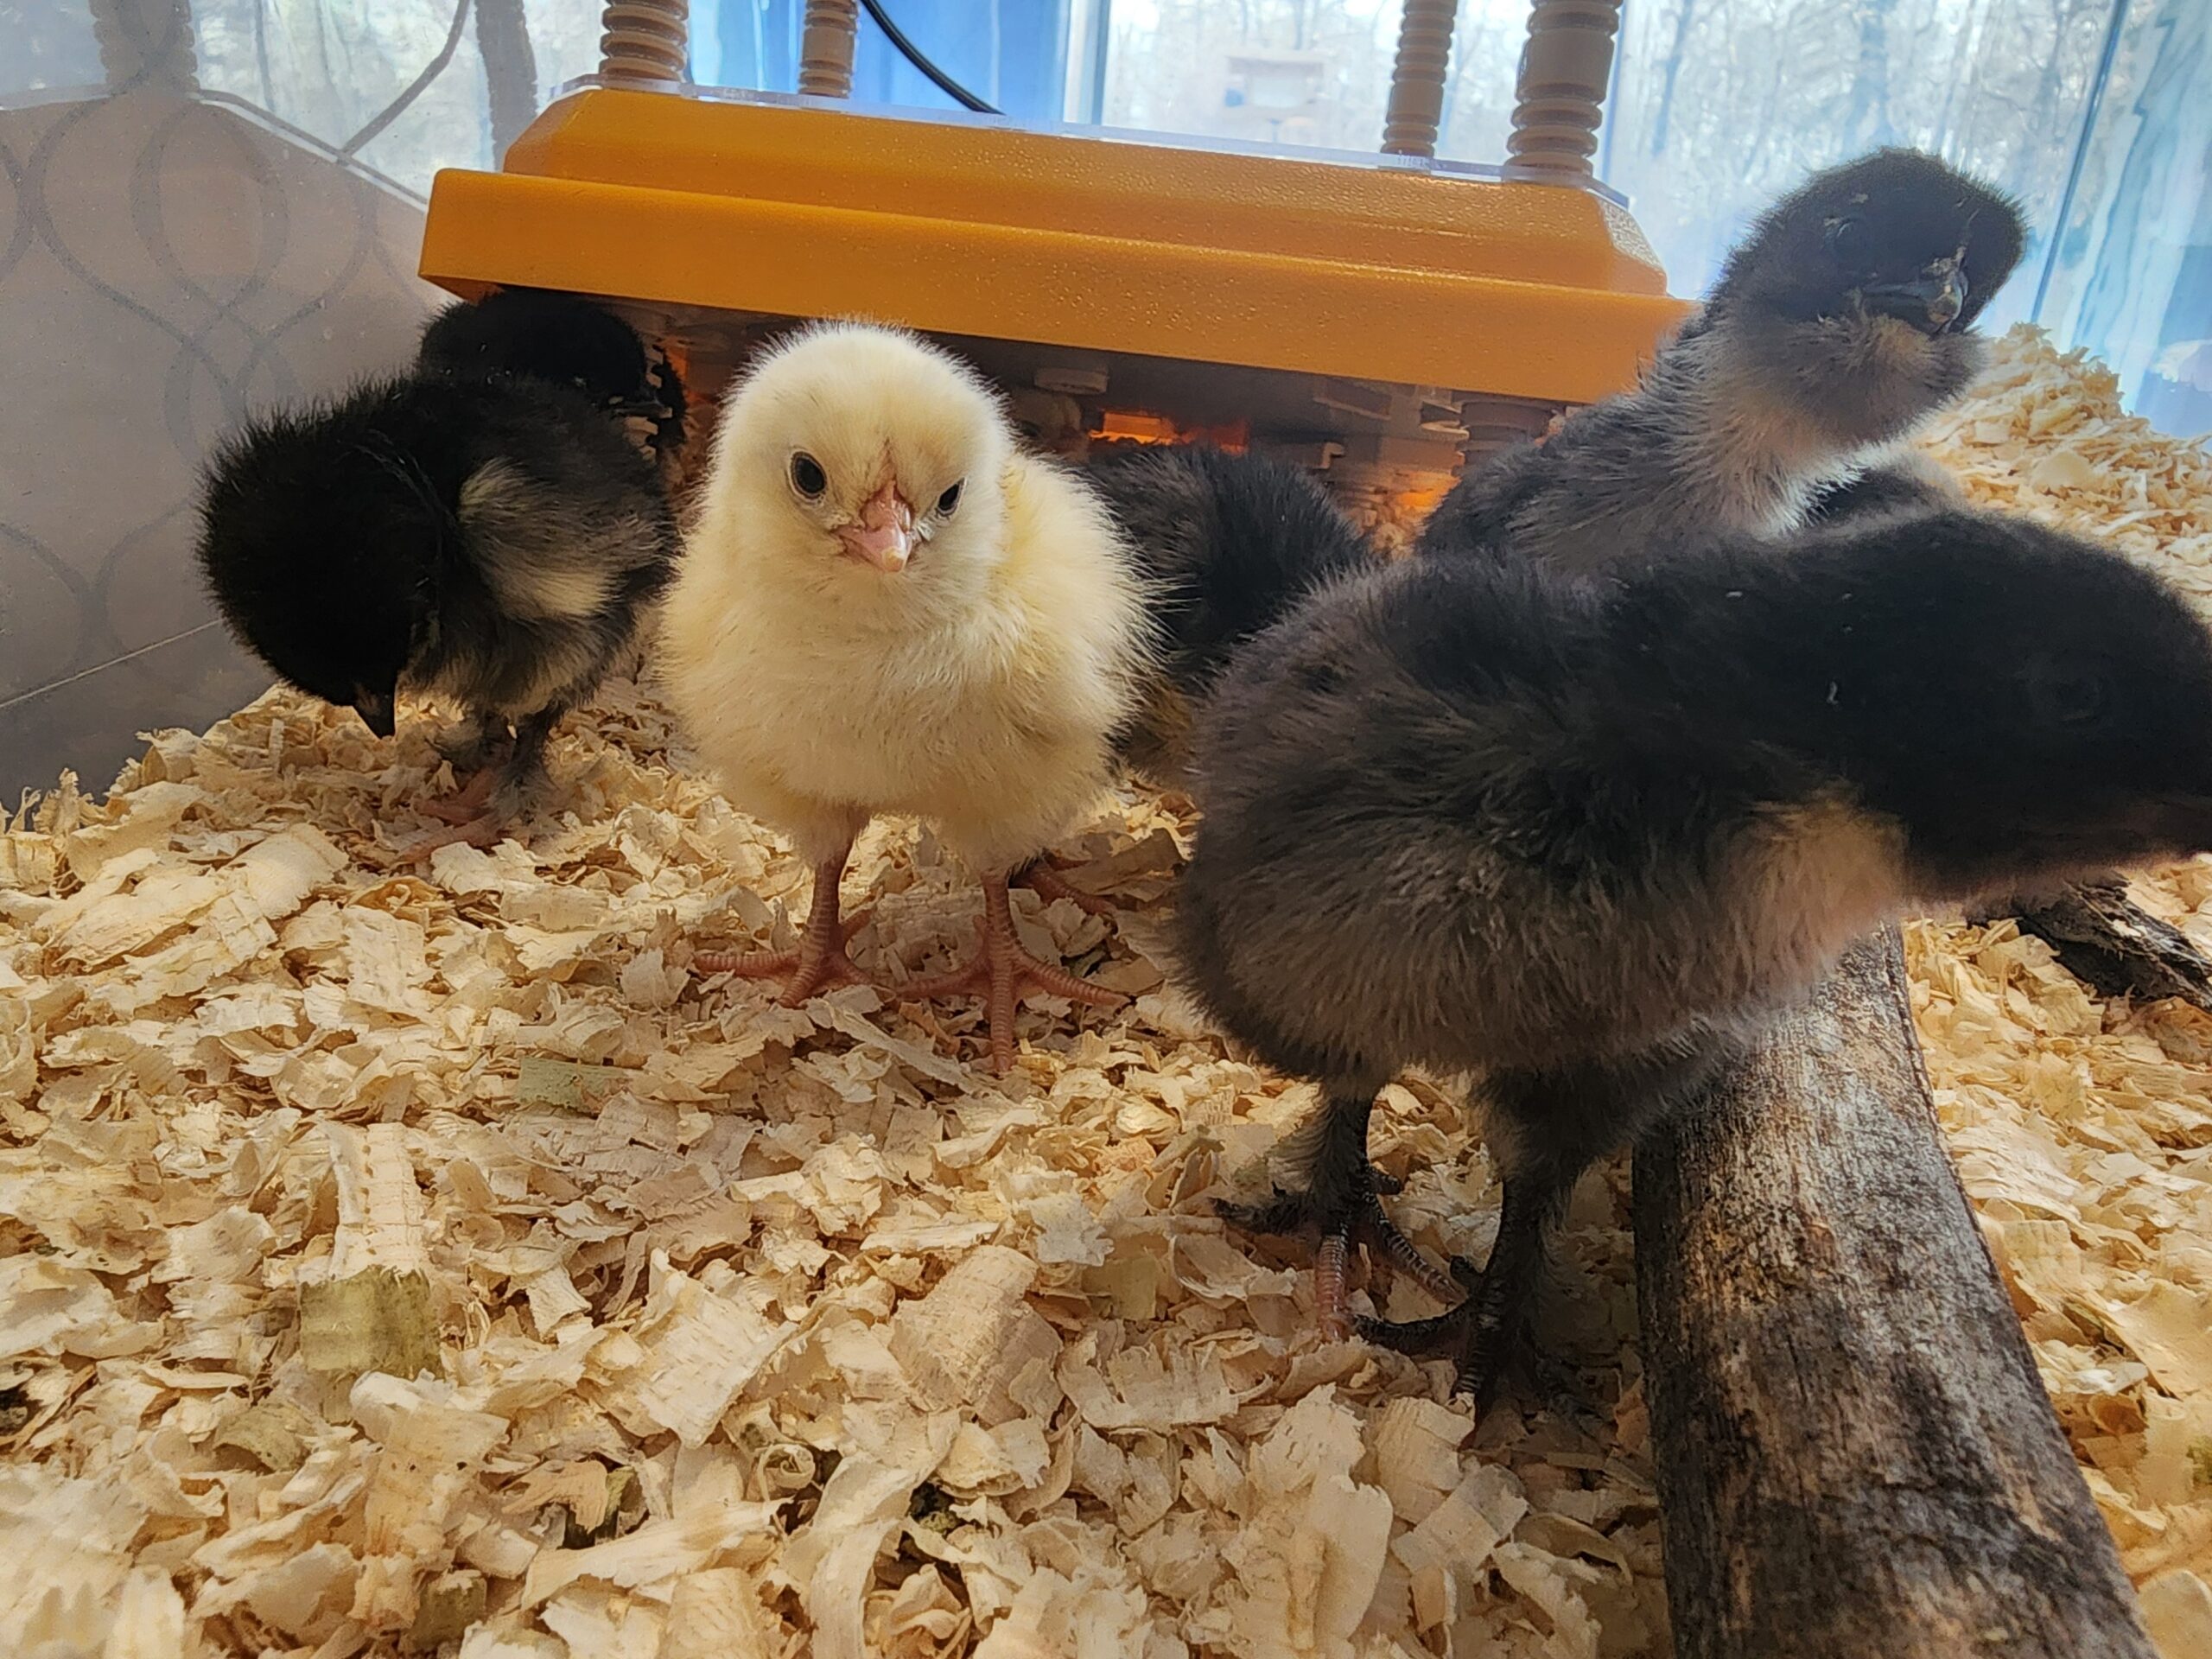
Reading about other people’s set-ups, and noticing how much sawdust was piling up on top of the lamp, I quickly realized it was a fire hazard and not the way to go. So I ordered a brooder radiant heater from Brinsea (a trusted brand) on Amazon. LINK HERE
It’s been much better for the 8 baby chicks. They have the choice of having supplemental heat or not have any if they don’t need.
The thing is though: they grow FAST!
I realized that our tote was huge for baby chicks that can barely stand on their feet, but not as huge for very active chicks jumping all over and trying to escape! I got worried they would start stressing out due to the lack of space and start exhibiting behaviors such as picking on others, fighting, pulling their feathers out, etc.

THE BROODER @ 4 WEEKS
After much wait, I received my new brooder enclosure; a pet playpen! THIS ONE to be specific. It is nice and spacious for our 8 baby chicks. They have much more room to run in, explore and not step on anyone else’s toes. I also love how easy it is to clean out the litter. I tuck a large garbage bag under the side door’s opening, drag everything into the bag, and close the door back up. To add new shavings, I go through the top opening instead since I make the shaving bag opening on the top of the bag.

WATER AND FEED
OK. Now there’s a couple things I want to tell you.
We’ve been learning as we go so I’m going to spare you headache, wasted food and time.
WATER
At first, we used the gravity fed gallon plastic waterer that came in the poultry starter box we purchased. I had added rocks so the chicks wouldn’t drown if they tipped in head first and couldn’t get out. This worked for about 5 days. Then, I’ve added elevating legs to it and that helped for about 1 day. They quickly started walking all over the rocks and kicking poop and shavings all over the water. So much shaving ended up in the water one time, they couldn’t even drink anymore! I got tired of having to clean the waterer 3-4 times a day pretty quickly.
Then, we switched to a pop plastic bottle with a nipple at the bottom (DIY). This has been wonderful and always stays clean. FYI, they drink ALOT! Sometimes, I wonder if they peck at the nipple for something to do rather than because they are thirsty! But seriously, just use the nipple technique right away and don’t bother with the gravity-fed waterers.
Once in the coop, we will obviously switch to something else but that’s TBD.

FEED
The poultry starter kit we bought came with 2 types of feeders: a gravity-fed one and a flip-top trough. I’ve tried the trough on day 1 thinking I’ve seen other people using those so it should be the obvious choice. Helas! The 8-day-old chicks were getting stuck in the trough, rather than simply eating out of it, so I switched to the gravity-fed feeder. The gravity-fed feeder worked well enough for quite a while… Until they started pooping all over the feed, roosting on the feeder and started kicking and digging the food out of the feeder with their feet! *Angry face!*
I said enough is enough. We were wasting SO MUCH feed! I looked online for more feeder ideas and found one that would work for outside too. We grabbed a small bucket that would fit in the brooder, cut 2 holes in it and installed THESE INSERTS. Now, they are still wasting some food, but way less when compared to using the other feeders.
So there you have it, all the knowledge I’ve gathered in the last 4 weeks raising 8 baby chicks!
I hope this post is helpful to you and saves you time, money and lowers your stress levels.
Thanks for reading! 🙂
Key Takeaways from Raising 8 Baby Chicks
- Hatching Eggs:
- Searched for affordable hatching eggs and opted for backyard mix (BYM) to avoid potential roosters.
- Two types of eggs (pointy and round) may indicate roosters and hens, respectively.
- Incubator Insights:
- Used a 12-egg automatic incubator, but faced issues with temperature control and humidity.
- Invested in a hygrometer and thermometer to monitor conditions more accurately.
- Preparation and Waiting:
- Preparation involves setting up a brooder, waterer, feeder, and starter chick feed.
- Managing anxiety and impatience during the incubation period is common; it’s essential to focus on the essentials.
- Hatching Experience:
- Observed that chicks have strong instincts and can communicate while in their shells.
- Minimal intervention is required during hatching; opening the incubator can drop humidity levels.
- Brooder Setup:
- Initially used a large tote for the brooder but transitioned to a spacious pet playpen for the chicks’ growth.
- Simplified cleaning by designing the brooder for easy access.
- Water and Feed Management:
- Started with a gravity-fed waterer but switched to a DIY nipple waterer to keep water clean.
- Experimented with various feeders, ultimately finding a design that minimizes waste.
- Final Thoughts:
- The journey of raising baby chicks is enriching and comes with its challenges.
- Sharing experiences and tips can help others save time, money, and reduce stress in their chick-raising endeavors.
Leave a Reply